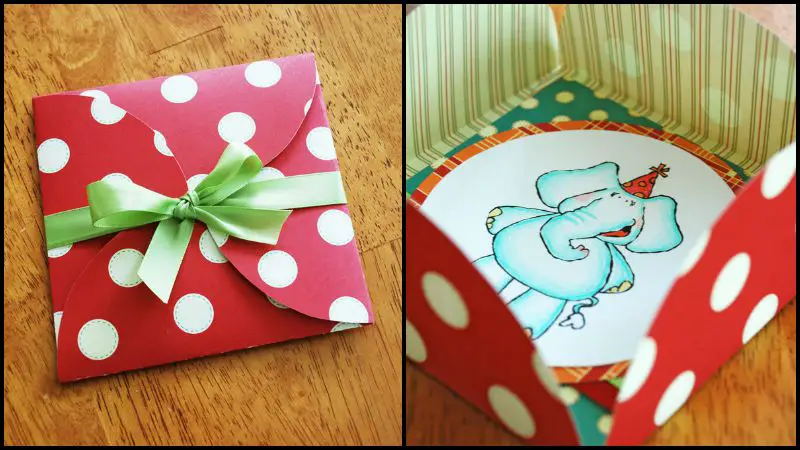
Want to make your greeting cards and letters even more special? This easy DIY envelope is perfect because it gives the recipient the feeling of opening up a present!
And it’s not just an easy project! This DIY envelope can save you moneyif you already have some beautiful thick paper and a few ribbons in your crafts stores. You just have to look into your supply and be creative!
This crafty idea can also come in handy for when you’re in sudden need of an envelope for other purposes, and you find out you have none left in your stationery supply. Simply replace the materials with a more appropriate design or look. For the card stock paper, choose plain instead of the ones with patterns. And instead of a ribbon, use washi tape to make your envelope presentable and not unsuitably grand.
Clever isn’t it? This DIY envelope is really quick and easy! So without further ado, check out the tutorial below! :)
Materials:
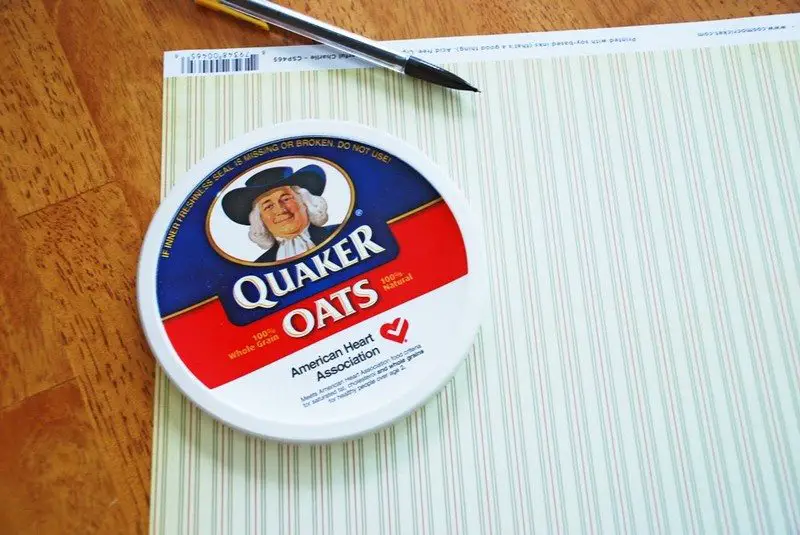
- Card Stock Paper (150 – 220 gsm)
- Any circular object with desired size (such as can lids)
- Ribbon
- Scissors
- Glue
Steps:
Trace four circles on your card stock paper.
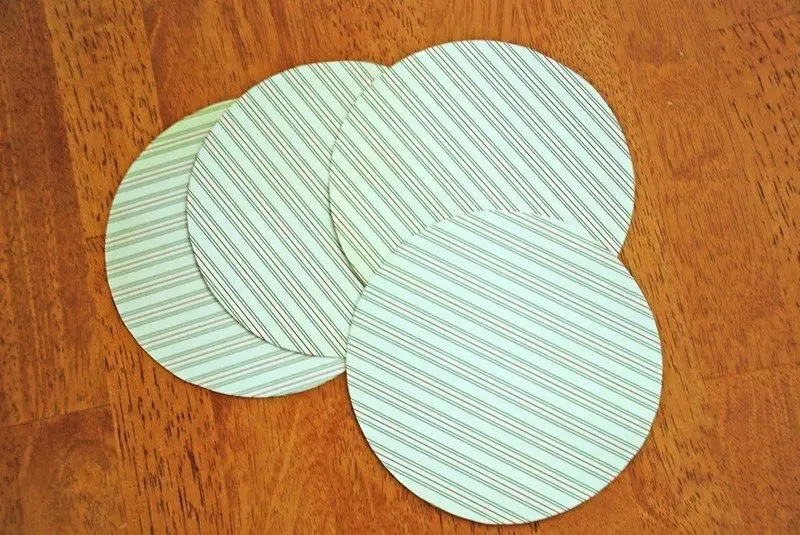
Cut them out as neat as you can.
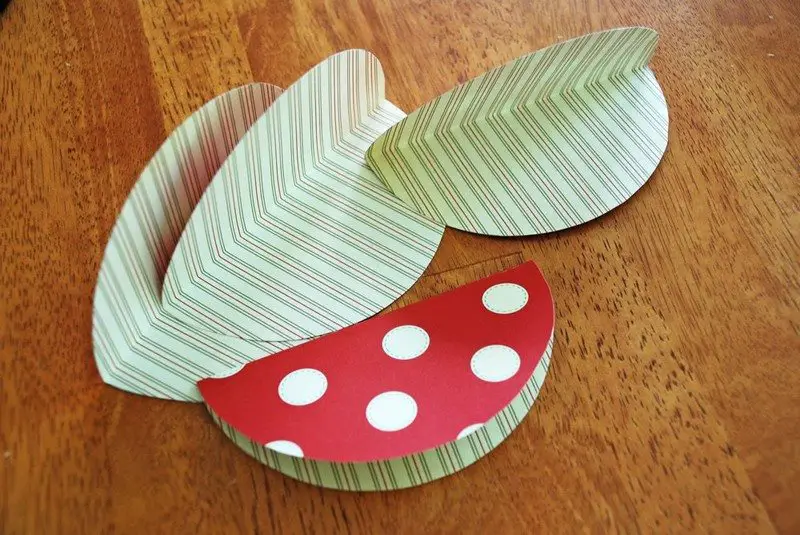
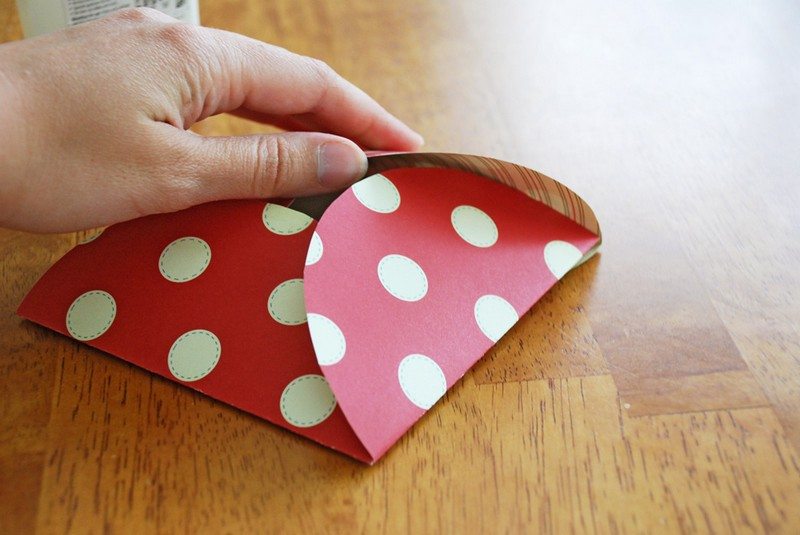
Crisply fold each circle exactly in half.
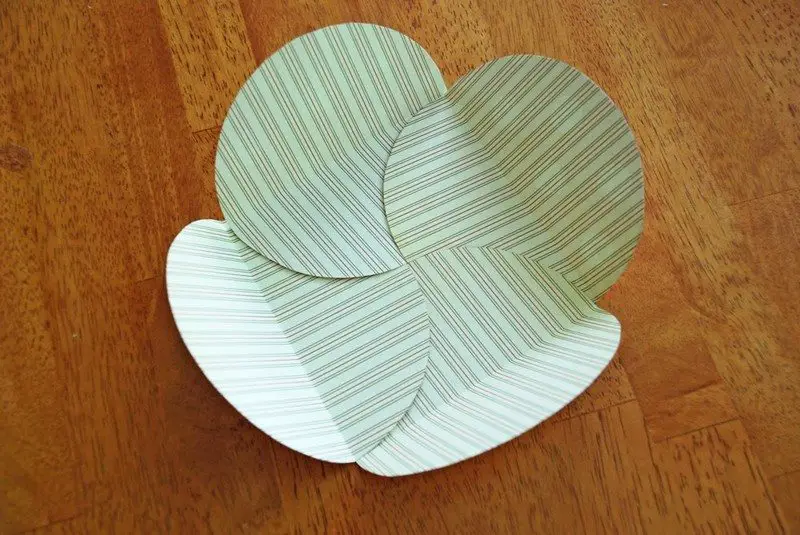
Arrange them all so that the folds form a square, with each circle overlapping the one next to it.
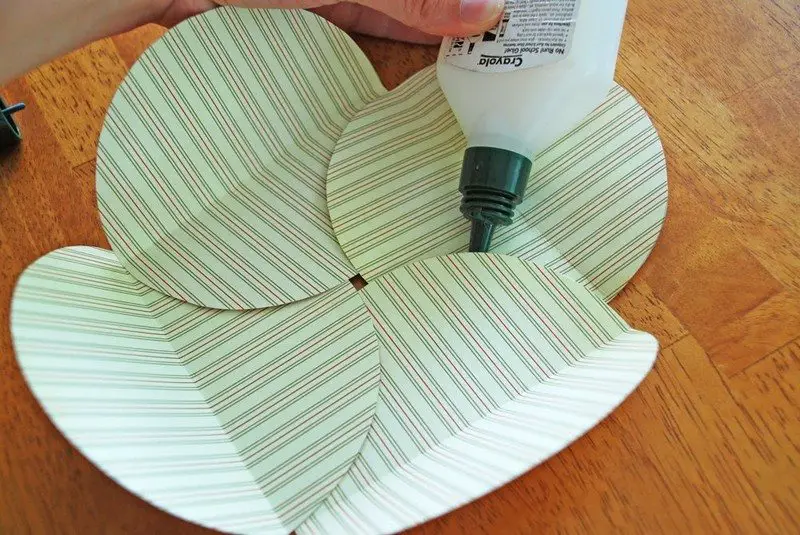
Apply glue in between the overlaps without moving the circles too much. And before all the glue dries up, quickly bring the circles together so that there’s no hole in the center and that the folds are forming a nice square.
You can stick one nice square piece of lighter gsm paper with the same size as the square of your envelope and directly write your letter there.
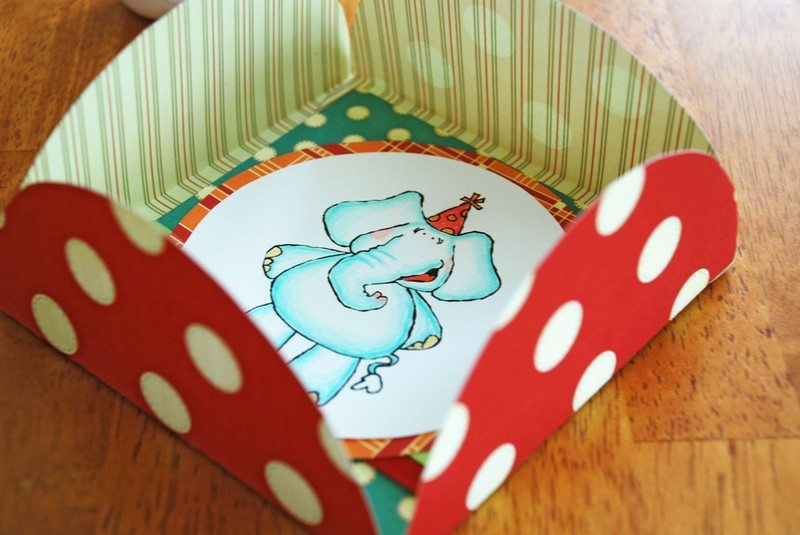
Or you can put a separate card inside….
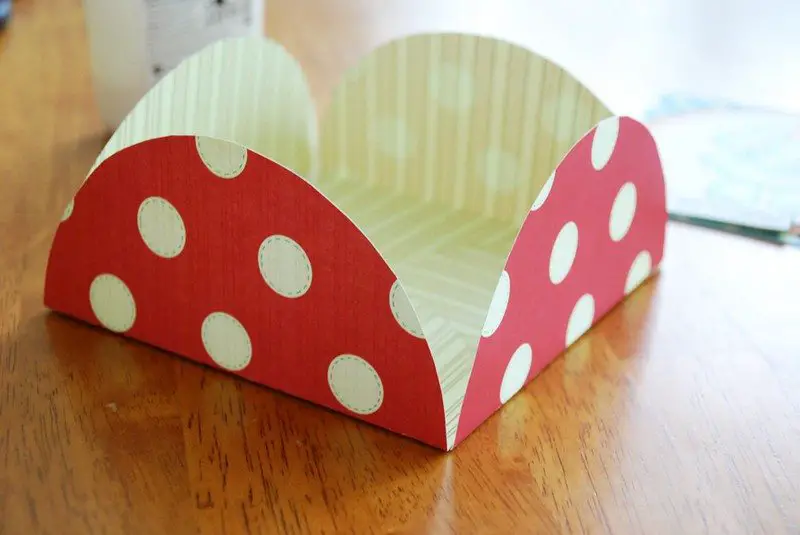
Carefully close each flap, each tucked under the one next to it.
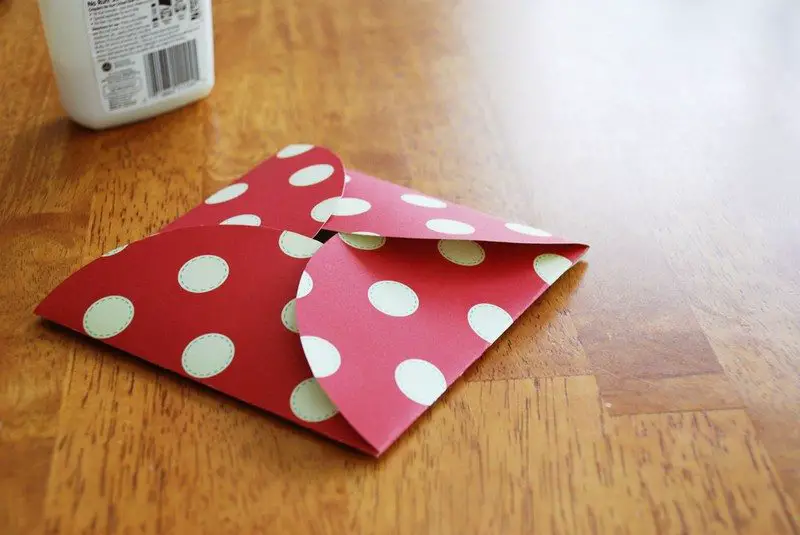
Be careful not to make creases on the flaps!
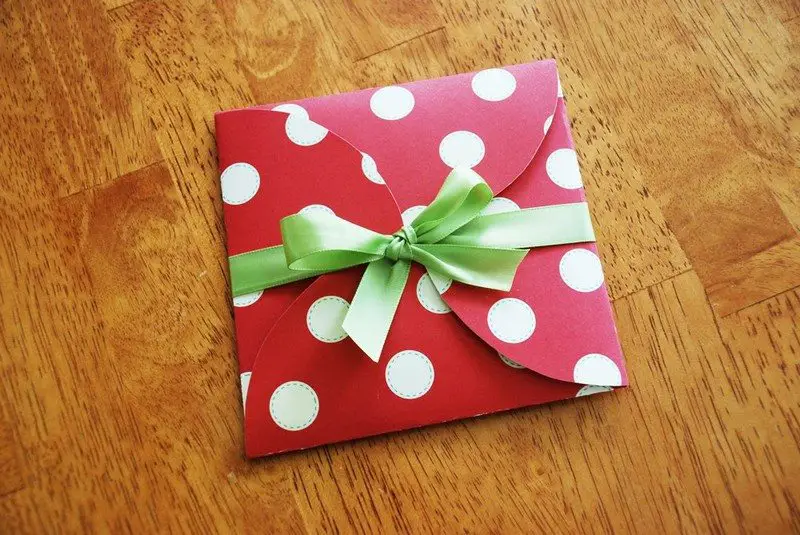
And finally seal it with a ribbon, just like a present. You can also apply two dots of hot glue gun at the back of your envelope so that the ribbon won’t slip off.
Thanks to ScrapNGal for this creative idea!